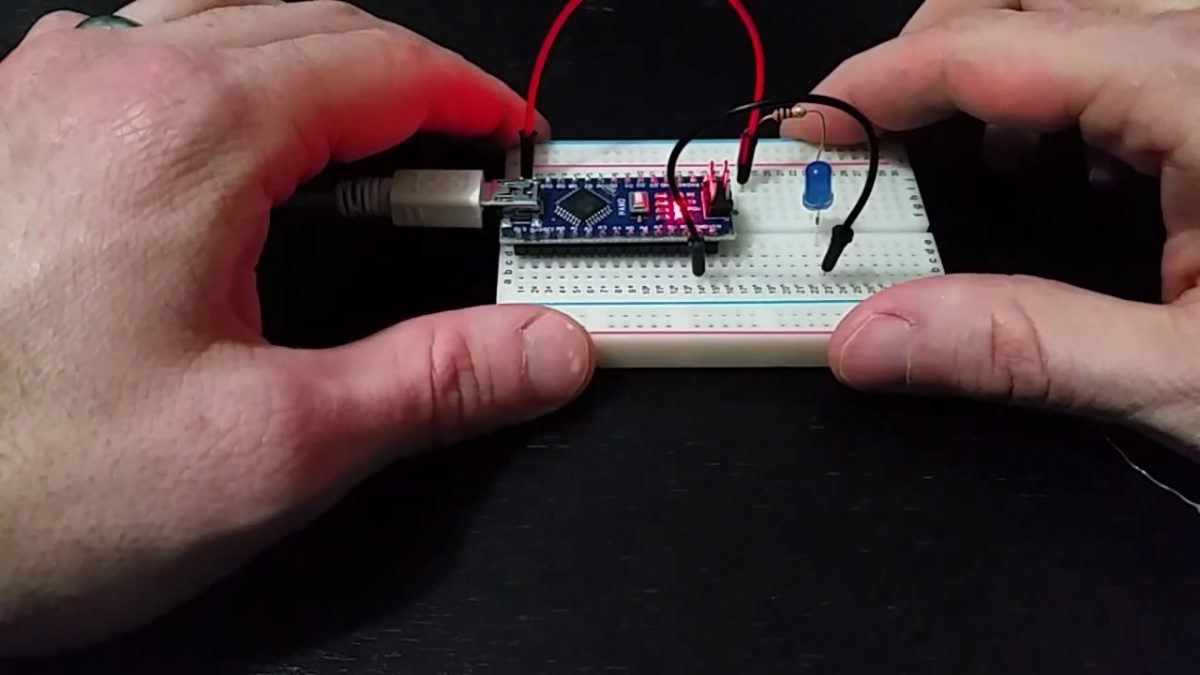
This is a basic Arduino training that will allow users to become familiar with the Arduino board, breadboards, jumper wires, resistors, LED diodes, and the Arduino Software (IDE). This tutorial will show users how to make a light blink and challenge them to add other components like a button or ultrasonic sensor to vary the length between blinks.
Materials Needed
- Arduino
- Breadboard
- 2 Male to Male Jumper Wires
- Resistor
- LED Diode
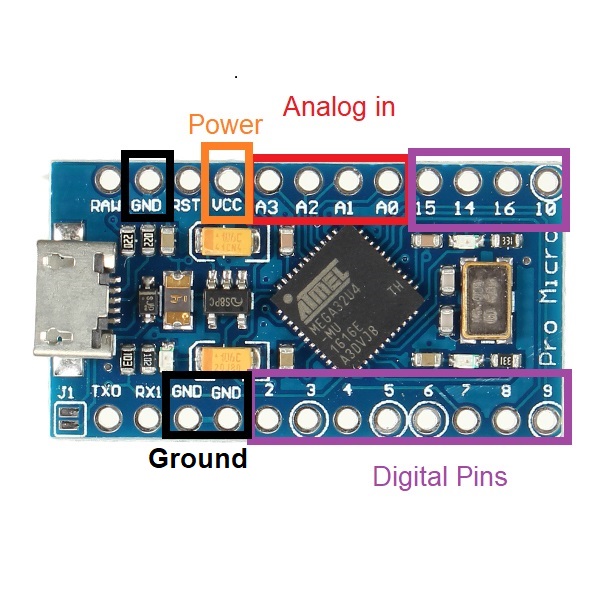
What are the Labels on an Arduino?
The Arduino board differs based on the type of Arduino board (i.e. Uno, Leonardo, Micro, etc.) you have, but the basic set up and labels are the same.
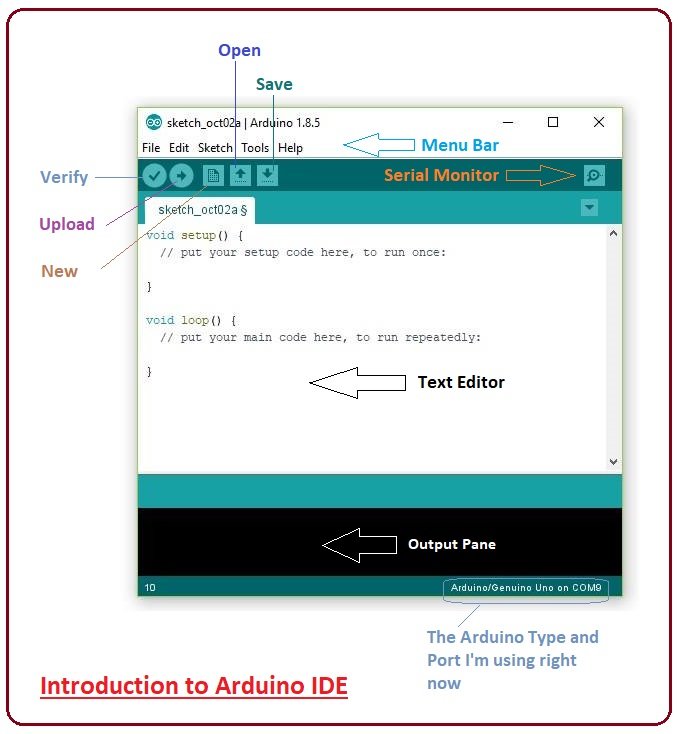
Understanding the Arduino IDE
The Arduino Software (IDE) contains the text editor where you can write code, a message area (output pane), a text console, and a toolbar. When the Arduino board is connected to a computer you are then able to upload sketches, programs, to the board. In the Arduino Software written programs are called sketches, and these sketches are written in the text editor and saved with the file extension .ino. In the text editor you can copy, paste, cut, search, replace text, and debug once code is compiled. Text in the message area will give you feedback on your code and let you know if there are any problems that you need to debug.
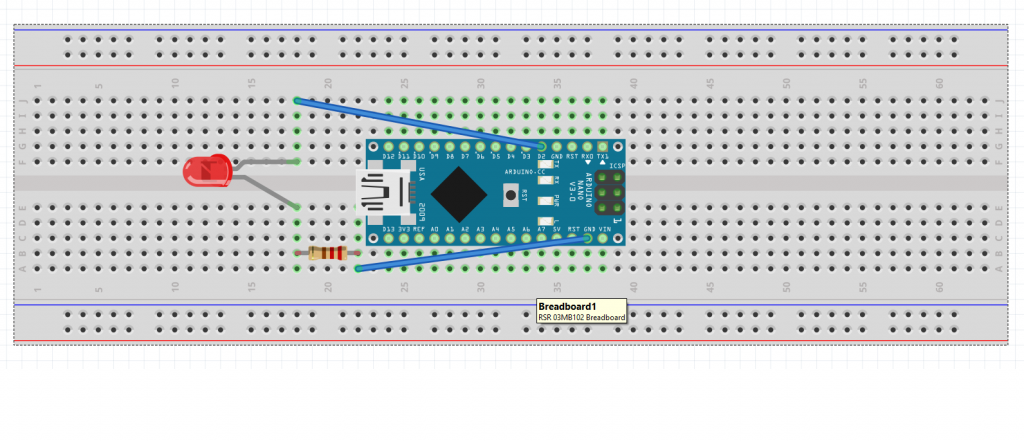
Layout for Button
Video Tutorial
Challenge
- Change the frequency of blinking (blink fast, slower, longer break before the light turns on, etc.)
- Make button blink by pressing a button
- Make a button blink faster or slower with an ultrasonic sensor
Additional Resources to Learn Arduino
https://arduinogetstarted.com/arduino-tutorials
http://www.ladyada.net/learn/arduino/index.html
https://tronixstuff.com/tutorials/
Facilitator
- PCB PumpkinI designed a custom PCB in the shape of a pumpkin for Halloween. It uses LEDs and a micro-USB connector to power it. Equipment/Software: Eagle PCB PCBWay LEDs Resistor Micro-USB Soldering Iron Solder Fume extractor Step by Step: Designed the PCB in Eagle Go to CAM Processor and export as a zip folder Go to… Read more: PCB Pumpkin
- Custom LED Lampsby Bryan Bushey, Linnea Caraballo, and Trevor Neal We designed custom LED lamps using LEDs and protoboards. Equipment/Software: 3D Printer Wood Soldering Stations LEDs USB Cable Spray Paint Electronics We soldered 3 LEDs in parallel using a protoboard. We then took a micro-USB cable and cut off the USB end and stripped the wires so… Read more: Custom LED Lamps