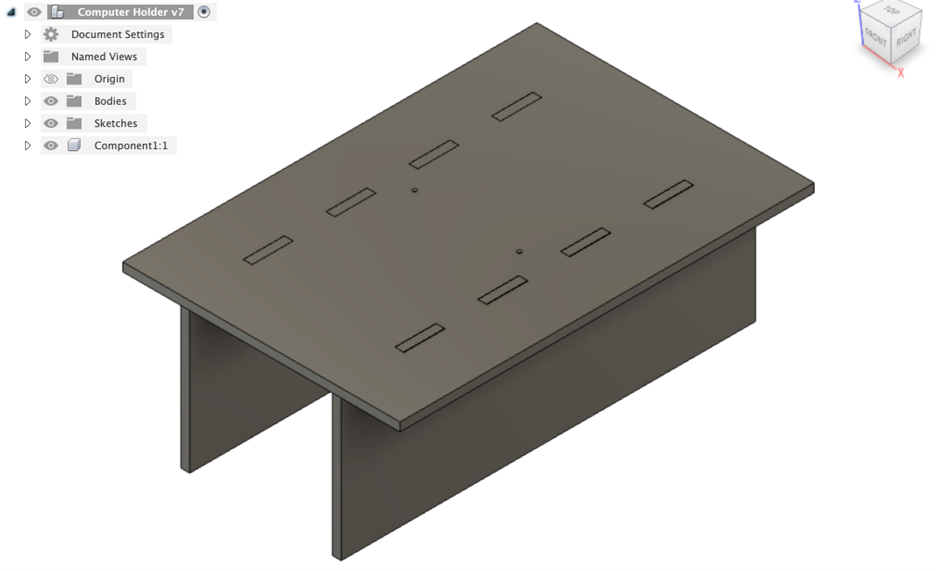
I designed computer stands so that we could keep the two computers in the main space at the Idea Lab between the two desks.
Equipment/Software Used:
Plywood
Fusion 360
Final
The final design was created in Fusion 360 and used finger joints to join the base and the legs. The space between the legs of the desks were measured and multiple prototypes were used to make sure that the computer holders fit perfectly. There were two drill holes in the top, this allowed us to bolt down the holders. Thus, preventing them from moving. The computers then sit on top of the stand.
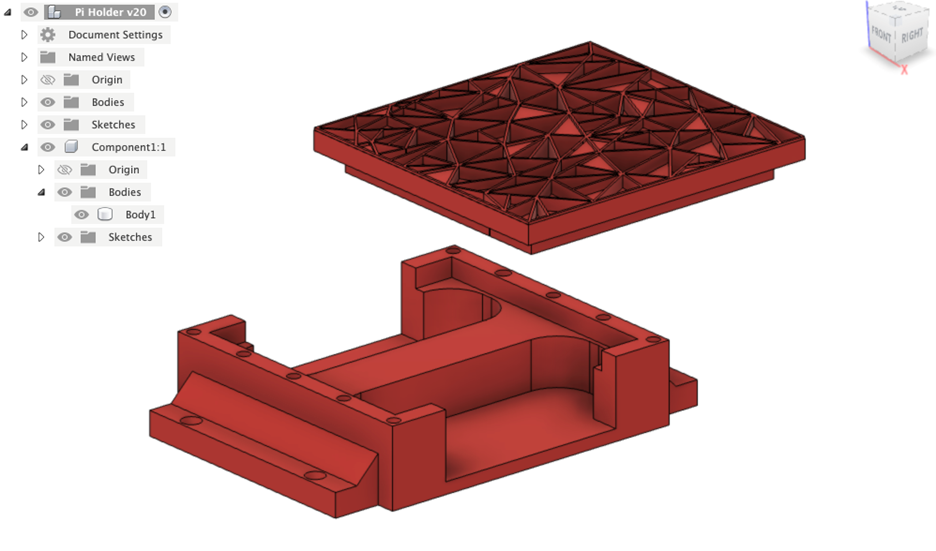
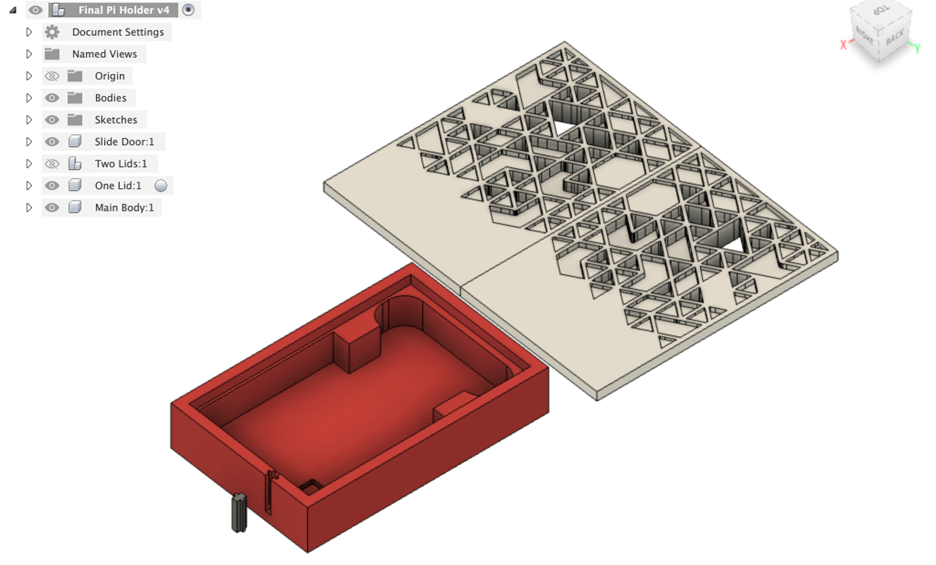
I designed a custom Raspberry Pi Zero holder for the desks.
Equipment/Software:
3D Printer
Raspberry Pi Zeros
Ribbon cables/connectors
Fusion 360
Power cables
Prototype
I was not sure how to execute what I wanted to accomplish with the Raspberry Pi holders. At first, I wanted to attach the holders to the front of the desk legs in the middle so that they were out of the way but still accessible. However, after we 3D printed them, we could not figure out a good way to create brackets to secure them to the desk legs. We also realized that this was impractical, especially if we wanted to use the GPIO pins in the future. This Pi holder design would also make it so that the table couldn’t be moved around since they would bind two tables together meaning that a new Pi holder would need to be designed if the desks were ever separated. This led to us deciding to make Pi holders that will individually sit on top of the desk, yet still look coherent when next to each other in the current setup.
Final
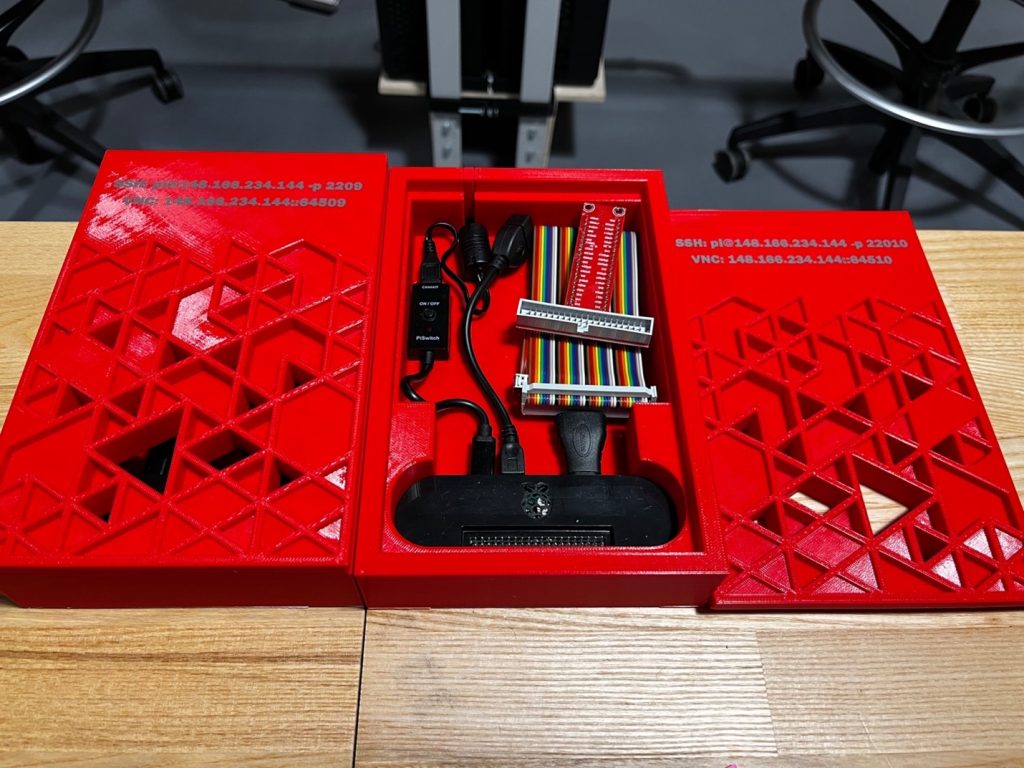
The final design allowed for us to put the Raspberry Pi holders at the corner of a desk with the Raspberry Pi Zero snuggly fitting in and having enough space for the ribbon connectors and power cables. This makes the Pi holders able to hold the Pi’s and the accessories needed to utilize them to their full potential. These Pi holders needed to work effectively, but also be appealing to the eye which inspired the design of the lid. To design the lid, I started by creating a SVG file of triangular patterns then importing that into the Fusion using the extrude tool to create the different depths.
Another thing that I added to the final design was vinyl labels to access the SSH and VNC. To do this, we had to set up two port forwards per Pi allowing for anyone to connect to the Pi’s if they are on Sacred Heat Wi-Fi. This will allow for users to be able to see the full desktop and GUI of the Raspberry Pi with VNC or to just use the command line using SSH. It also allows for all GPIO pins to be accessed and usable with a breadboard making it easy to attach sensors, so the Raspberry Pi’s are fully functional.
by Bryan Bushey, Linnea Caraballo, and Trevor Neal
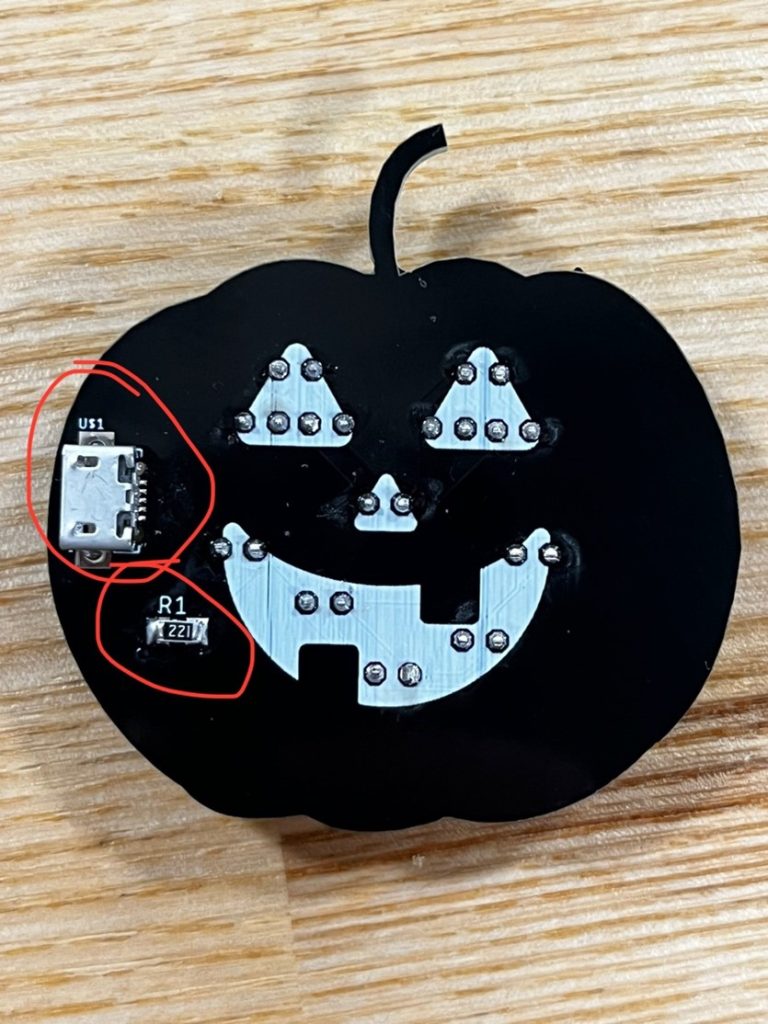
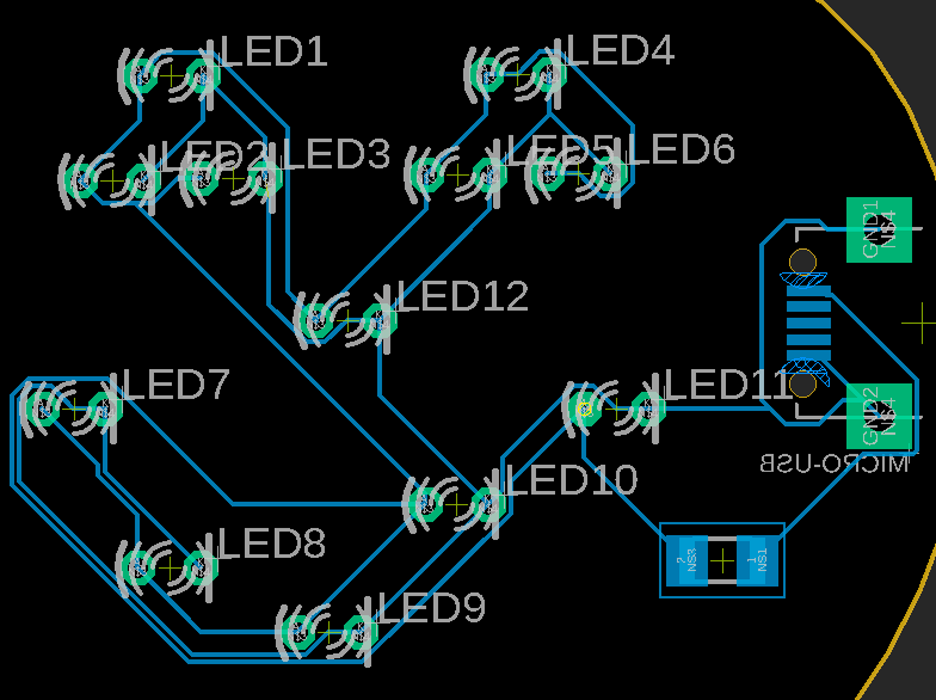
We designed custom LED lamps using LEDs and protoboards.
Equipment/Software:
3D Printer
Wood
Soldering Stations
LEDs
USB Cable
Spray Paint
Electronics
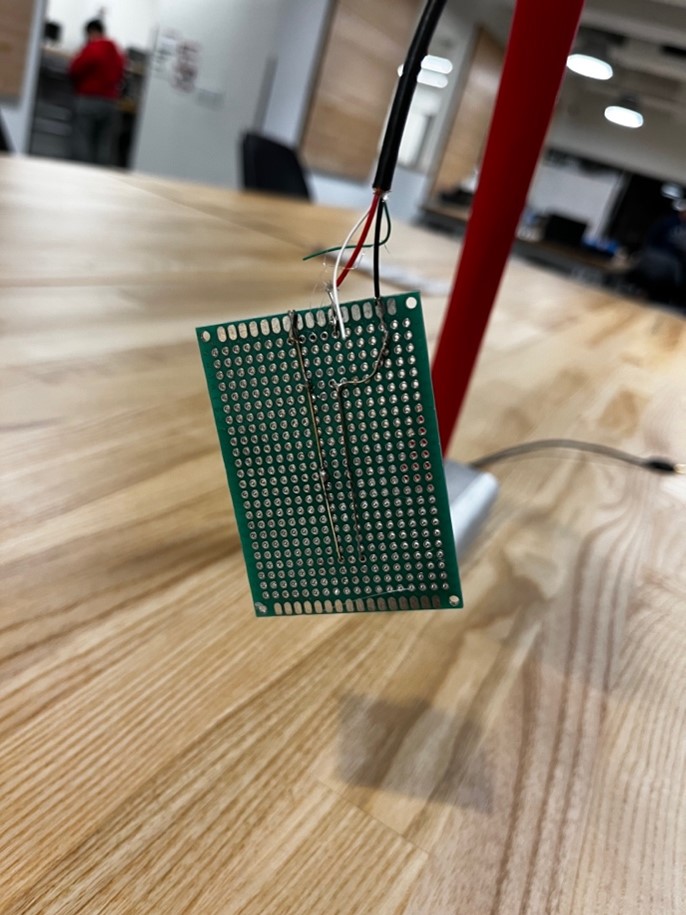
We soldered 3 LEDs in parallel using a protoboard. We then took a micro-USB cable and cut off the USB end and stripped the wires so that it exposed the power and ground cables. We then soldered these to the LEDs so that they could be powered.
Final
The final design for the LED lamp was using a 3D printed lamp shade, a wooden base, and reusing hula-hoop parts to make the arm of the lamp. We then spray painted the base and hula-hoop part.
This was one of the first electronic projects and workshops done, so it was a good way to get the hang of running workshops. It was also one of the first collaborative projects between multiple staff members and it allowed us to reuse parts that we no longer needed without having to throw them out.