This training will teach users how to use the Carvey CNC Router and Easel. Completing this basic training will allow users to use the Carvey and give them the knowledge needed to operate the machine and the compatible software, Easel.
What is Easel?
Easel is a web-based CNC software platform that allows users to design, import, and carve from a single program. Easel is easy-to-use for makers of any level and is free to use.
Easel Training Video
Introduction to Easel
-How to change materials size and type
-How to change bit size and type
-Navigating the work area and view panel
Importing SVG Files Into Easel:
-Manipulating objects
-Different cut paths
-Cut depth
-Carvey simulation view
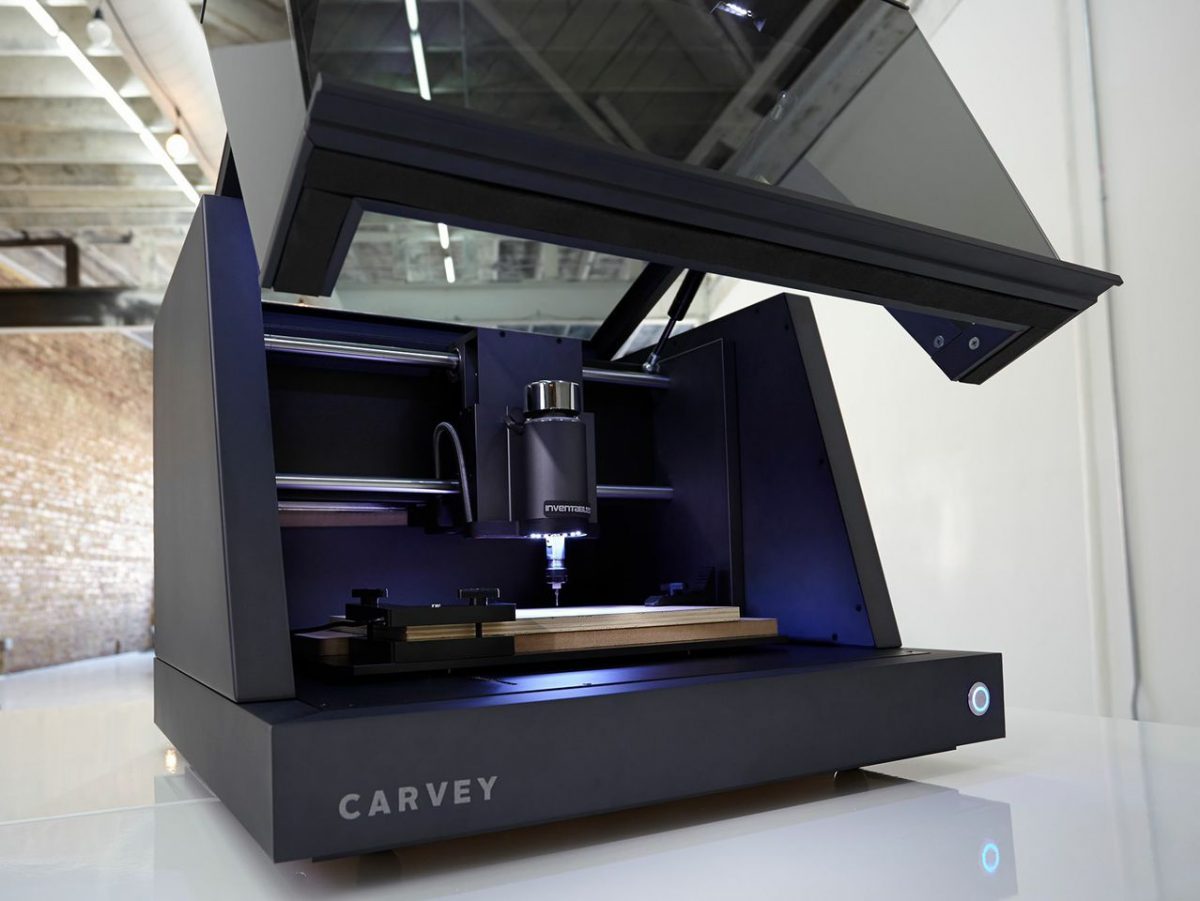
What is the Carvey?
The Carvey is a fully enclosed CNC Router that was designed with safety and simplicity in mind. Using Easel users can create a simple design and cut it out on various materials like wood and plastic in a few minutes.
Carvey Training Videos
Carvey: Overview
Carvey: Button Functions
Carvey: Preparing Materials
Carvey: Use Guide
Safety
Before using the Carvey, read the Carvey Safety Manual.
Important Notes:
- Make sure that the Carvey work area is clean, this includes the waste board
- Make sure that the Carvey is off whenever changing bits or securing material onto the waste board
- Make sure that the Carvey main door is closed before powering on
- Stay alert when using the Carvey and never walk away from it while it is being used
- Make sure that all wrenches are no longer attached to the Carvey
- If a bit breaks, make sure to pause the job and wait until the machine is powered off before opening the main door
Take the Quiz
Cheat Sheet
- Remember to measure the size and thickness of the material and change it in Easel
- Double-check what type of cut you want to make
- Make sure that the bit is correct and secured before cutting
- Make sure that the waste board is clean, free of any dust/debris
- Secure your material to the waste board using the clamps and smart clamp and make sure that the clamps are not in the way of where you are cutting
- Make sure that your design is on the material before starting to cut
- If you need to stop your print for any reason press the pause button and wait for the machine to stop before opening the main door
Facilitator
- PCB PumpkinI designed a custom PCB in the shape of a pumpkin for Halloween. It uses LEDs and a micro-USB connector to power it. Equipment/Software: Eagle PCB PCBWay LEDs Resistor Micro-USB Soldering Iron Solder Fume extractor Step by Step: Designed the PCB in Eagle Go to CAM Processor and export as a zip folder Go to… Read more: PCB Pumpkin
- Custom LED Lampsby Bryan Bushey, Linnea Caraballo, and Trevor Neal We designed custom LED lamps using LEDs and protoboards. Equipment/Software: 3D Printer Wood Soldering Stations LEDs USB Cable Spray Paint Electronics We soldered 3 LEDs in parallel using a protoboard. We then took a micro-USB cable and cut off the USB end and stripped the wires so… Read more: Custom LED Lamps