This training will teach users how to navigate Fritzing in order to make a custom PCB design in Fritzing. It is recommended to take this training before the Carvey PCB Training which will then show users how to prepare their Fritzing Project for use wiht the Carvey. In order to take the Carvey PCB Training the Carvey Training must be taken first.
Fritzing PCB Training Video
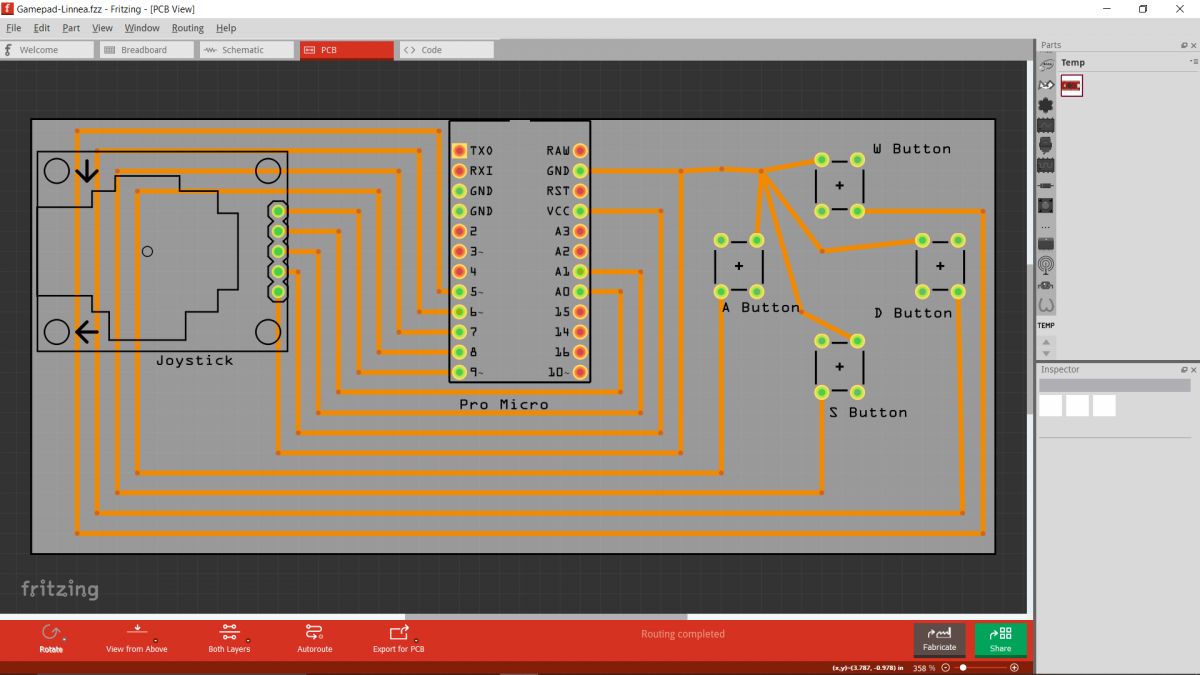
Fritzing UI:
-How to navigate Fritzing
-Changing size of PCB
-Adding parts
-Wiring/Creating connections
Fritzing Important Notes:
-Keep in mind the size of your PCB
-Make sure wires are not too close
-Make sure PCB board encapsulates all components
-Make sure you are wiring on the bottom layer
-Keep in mind the complexity and time needed to print your PCB
Take the Quiz!
Cheat Sheet
- Make sure that the PCB fits onto the size of the material you will be using
- Make sure that there are no overlapping wires
- Check the scale of everything using the ruler tool (i.e. how far components are from each other)
- Make sure that wiring is on the correct side, either the top or bottom (one-sided PCB means wiring should be on the bottom which is ideal especially when designing your first PCB board).
Facilitator
- PCB PumpkinI designed a custom PCB in the shape of a pumpkin for Halloween. It uses LEDs and a micro-USB connector to power it. Equipment/Software: Eagle PCB PCBWay LEDs Resistor Micro-USB Soldering Iron Solder Fume extractor Step by Step: Designed the PCB in Eagle Go to CAM Processor and export as a zip folder Go to… Read more: PCB Pumpkin
- Custom LED Lampsby Bryan Bushey, Linnea Caraballo, and Trevor Neal We designed custom LED lamps using LEDs and protoboards. Equipment/Software: 3D Printer Wood Soldering Stations LEDs USB Cable Spray Paint Electronics We soldered 3 LEDs in parallel using a protoboard. We then took a micro-USB cable and cut off the USB end and stripped the wires so… Read more: Custom LED Lamps